Recently, I have started thinking about opening an online Etsy store. Selling crocheted goods, like baubles or little amigurumi creatures, and so on. But I have thought, if people wanted to buy something from me, what would they buy? And that’s where you come in. If you want, I would like you to tell me what kind of things you would personally like to get from an Etsy store, just to give me some possible ideas and inspiration.
Please note, that it will probably be quite a while until I actually open an Etsy shop. I would still like to work out all the little details, postage and all sorts of other things. I’d say maybe give it three months for the shop to open, but I won’t guarantee anything.
That’s all for now, and I’d love to hear your ideas!
One of the most classic crocheted patterns is a Granny Square. I’m sure that you’ve seen one before, or that you’ve seen a movie or TV show that have had a Granny Square blanket somewhere in a scene.
As you can see, you can create some beautiful things with granny squares. It also depends on the colour combination that you use, but that will be for another post.
As you can tell, there are so many different things that you can do with a granny square design. It might not be a square, but it is the design of a granny square.
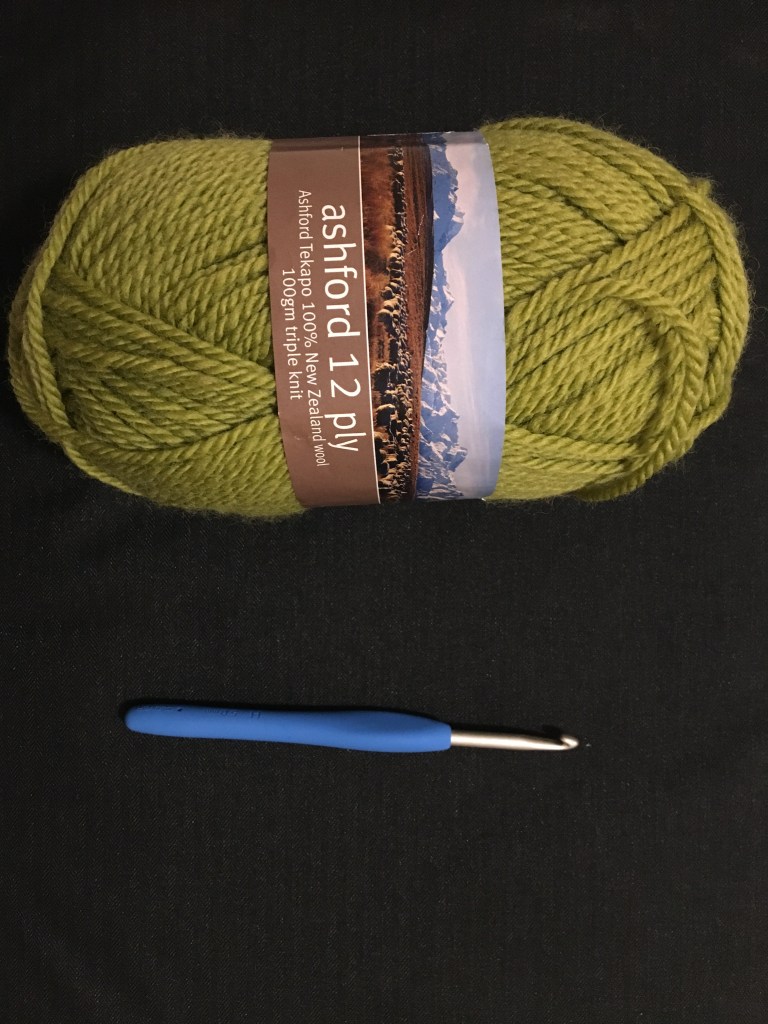
For this, you can use any yarn that you would like, with a corresponding hook. For this post, I have used an 8 ply yarn with a 4mm hook.
IMPORTANT NOTES:
This pattern uses American style crochet terms.
Stitch translation guide:
Ch = Chain (You may also see Ch 4, which means chain 4)
Dc = Double crochet
Sc = Single crochet
SS = Slip stitch
Shell = 3dc
corner shell = 3dc, ch2, 3dc
Beg shell = Cg 2, ch2, 3dc
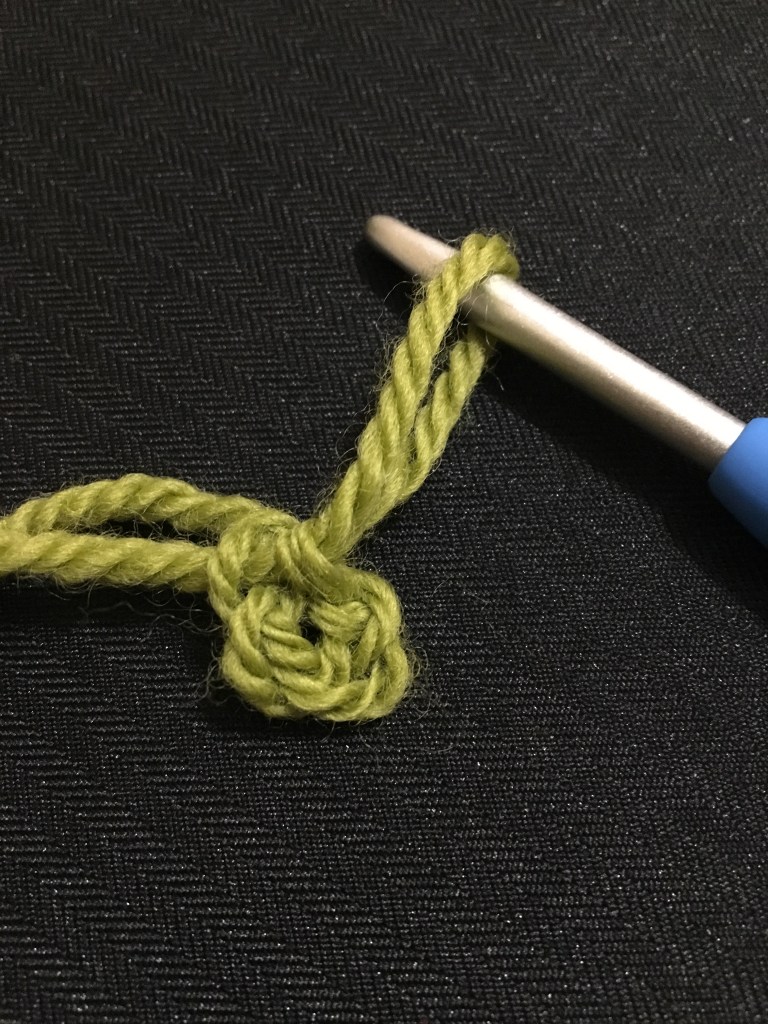
Round One: Ch4. SS into first chain to create a loop.
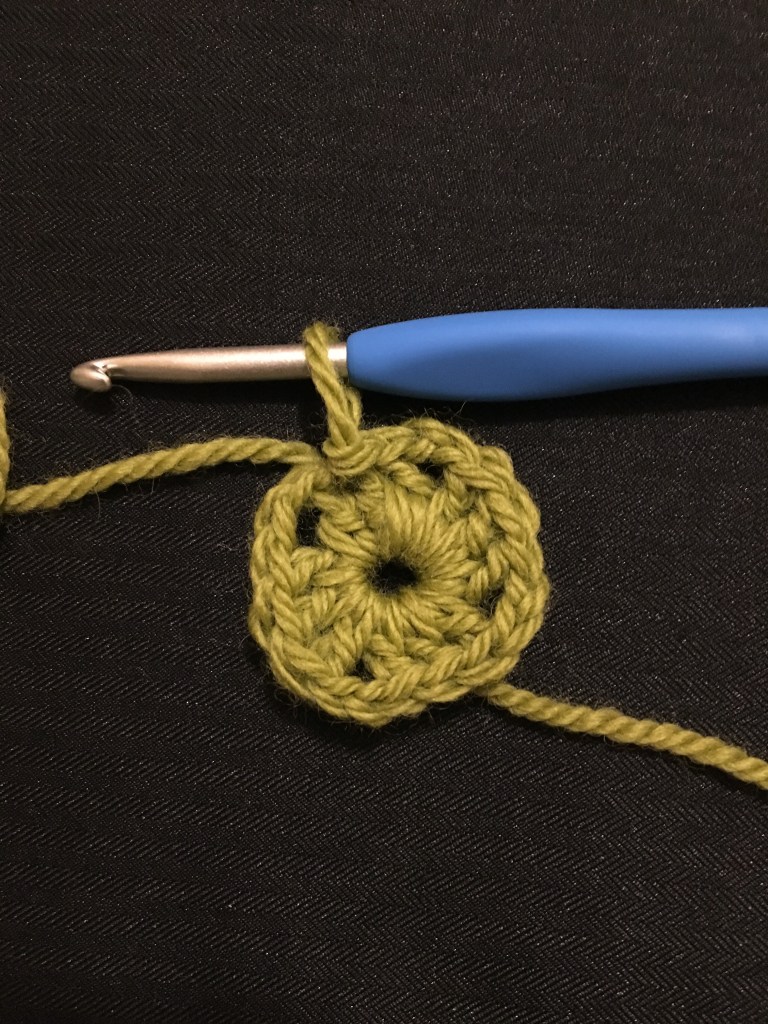
Round Two: Ch2 (counts a 1 dc), dc2, ch2, 3dc. SS into second chain to finish the round. (4 shells)
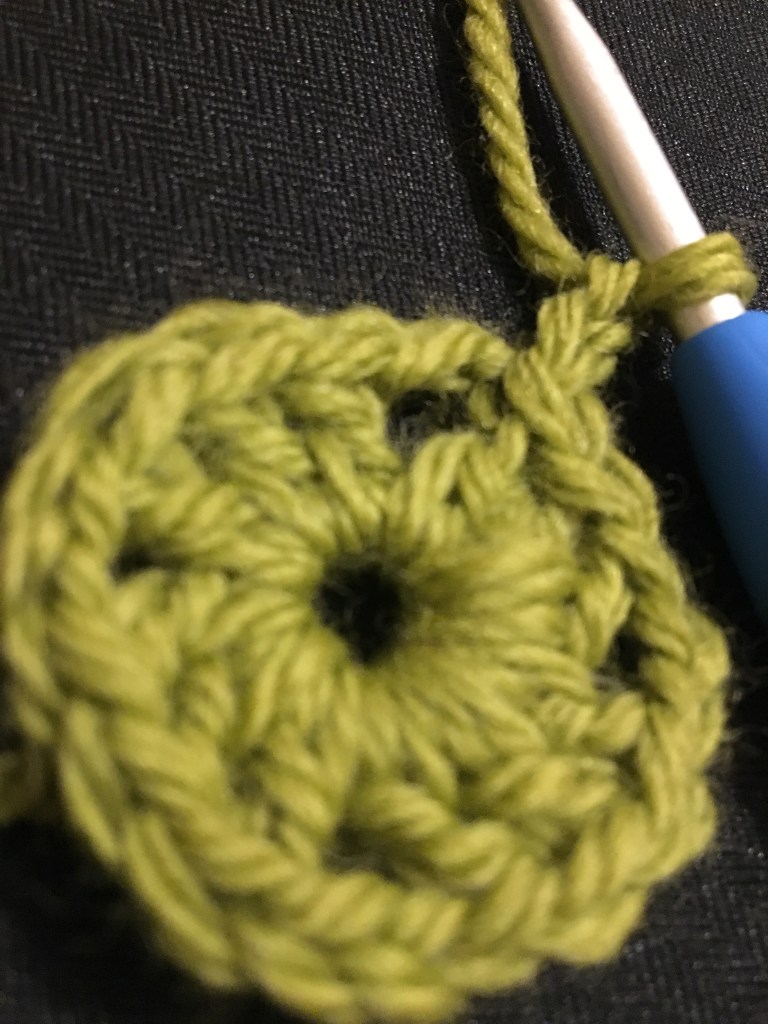
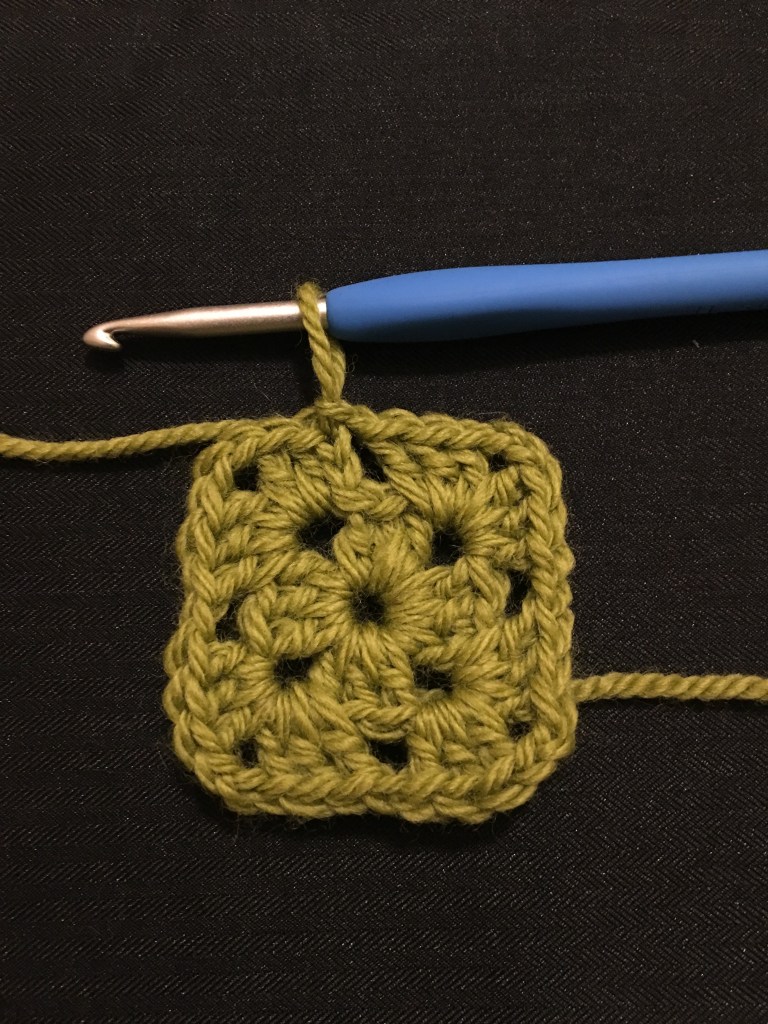
Round Three: SS across the top of each the last two dc until you get to the chain two loop. Beg shell, *ch1, corner shell. Repeat from * SS into the second chain to finish the round.
I know it’s not really the best picture. Let me know if you would like me to insert a better photo, or just make a post on how to do this.
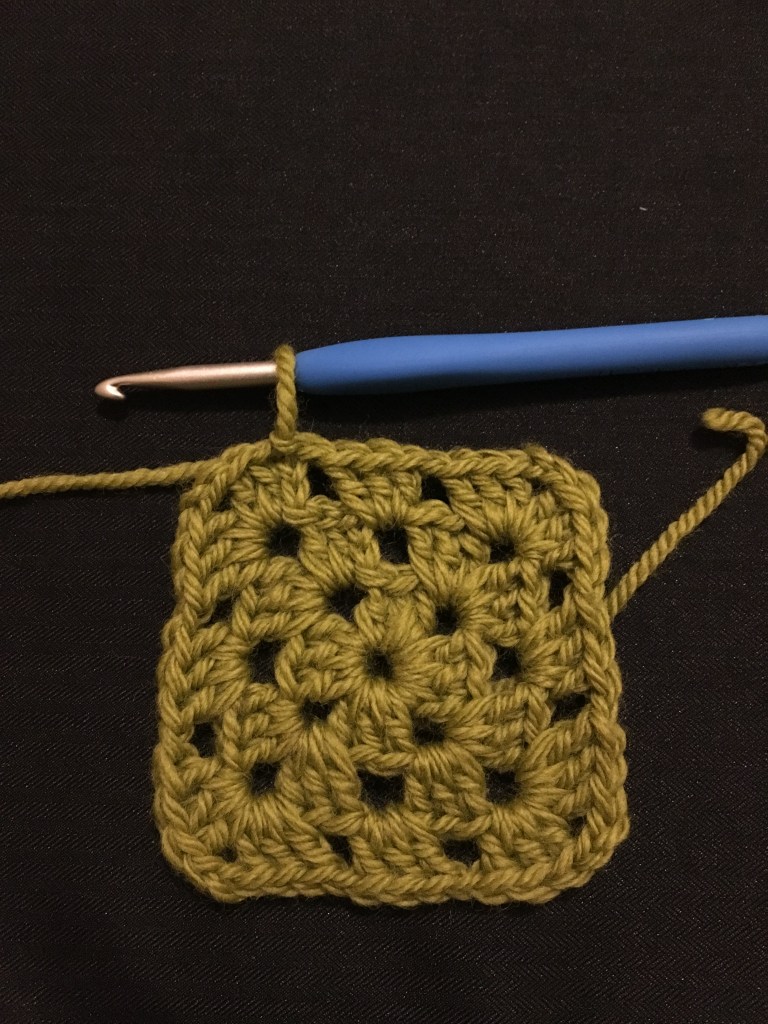
Round Four: Beg shell, *ch1, shell, ch1, corner shell. Repeat from * SS into second chain to finish the round.
CONGRATULATIONS! That is all there is to making a granny square! It’s simple, no? Don’t feel bad if you haven’t mastered it yet. It took me quite a while to get the hang of it, but soon you’ll be making all sorts of Granny Square design items. You might understand it better now, but when I say granny square design, I mean that the pattern is written in Shells. The shells might not neccesarrily in 3dc, but it is just that repeated thing. Stay tuned for more Granny Square patterns coming soon-ish!
Thank you for reading, and I’ll talk to you in the next post!
(Please let me know if there is anything wrong with this pattern, or if you are having trouble understanding this pattern.)
Little details are very important when you are writing a story. In this post, I will try and explain how you can include little details into your story to bring it to life a bit, or just give it some depth.
What are Little Details?
First off, you need to understand what I mean by little details. To do this, I will give two example sentences, and I want you to decide which one is more easy to read and understand.
Sentence One: Sarah sat on her bed. She picked up her book and started reading. She lost track of time and read for two hours. When she finished reading, she went to bed.
Sentence Two: Sarah sat on her bed, and sighed. She was exhausted from her long day, and all she wanted to do was read. She picked up her book that she had left on her bed from earlier, and read for two hours, before turning her light off and going to sleep.
I’m pretty sure that you can agree that sentence two, is a lot more easy to read, because it gives a lot more depth to the scene. It describes everything that needs to be described, but it still runs smoothly.
How do you incorporate them?
To incorporate little details into your writing is simple. All you have to do is think about things that would make it seem like it’s actually real. Describe things that give the scene some feel to it, and that actually makes you feel like you are there, in the story.
How many details are too many?
There is a fine line between describing necessary things and just an over described story. If you have a good balance, the story should run smoothly, and there shouldn’t be pages of pages describing one little detail.
Things to remember:
Only describe important things
Always have continuity
Maybe write some notes on little details so you remember them
Make sure that these things actually have some relevance, even if it doesn’t change the entire plot, don’t just add in random things that could end up confusing your readers
This concludes my post on me trying to be helpful. Let me know if there is anything that you think I should change, or please tell me your opinions.
Thank you for reading, and I’ll talk to you in the next post!
One thing I realised today, is that in my original Aloe Vera post, I never explained how to water them. Which, in my personal opinion, is one of the main reasons why anyone can take care of an Aloe. And that is the topic of this post.
Now to water an Aloe Vera, it is extremely simple. And I was surprised at how easy it is. I thought that they needed to be watered all the time, but I was so wrong.
When you first get your Aloe Vera, you probably should water it, and to do this, you drench the soil then, sit it in your bathtub, or sink, or even outside for a bit*, until all the access water has drained through, so when you put your Aloe Vera back in your in your house, it won’t be sitting in a pool of water. This is because Aloe Veras don’t like sitting in water, as it can rot the roots and eventually kill the plant. I have had this happen to another plant, as I was watering it quite a lot, and in knew nothing about plant care, so it’s no surprise that it died after a month of owning it. (R.I.P Planty)
*I recommend that you put your aloe outside if you can, so that you can give it a bit of sunlight to help it grow a little bit faster. Maybe don’t put it in direct sunlight, but more dappled light if you can, and don’t put it out if it is really cold.
To water your Aloe next, wait until all the soil is completely dry to water it again. You’ll also notice that your Aloes leaves will start to shrink as it is losing liquid, so that should be a clear indication to water it again. When it has enough water, the leaves of it will appear a lot more plump and full.
This concludes this post, and if there is anything else you’d like to know about Aloe Veras, please ask me and I’ll be happy to help and try to answer your questions.
Thank you for reading and I’ll talk to you in the next post!
Today I remembered that I had a succulent growing in my kitchen. I took a cutting of it from a friend of mine, and stuck it in water to see what will happen. About a month later I remembered it and checked on it. And to my surprise, it has started growing a root system.
I honestly have no idea what this succulent is called, so if you know, please tell me. I’m hoping to try and grow it more and eventually maybe it turning into this big plant, but we’ll see what happens a little later on. But, here is what it looks like now.
As you can see, it is quite small, and the roots are quite delicate, so I might wait a little longer until I put it in some soil.
In my previous update, I said that I hadn’t done anything, and that by the next update I would have written something for my story. Well, we have a snag. I don’t know what to write about.
And before you say, ‘What about the flash card that you wrote about the character on?’ Well, I just realised that I didn’t really want to write that story. I just lost inspiration for it and I am no longer wanting to write it. I don’t know why it is. Maybe I’m too stressed about the busy week ahead, with school starting again, I just feel like there’s no point in writing it. Whatever the reason, I’m not going to be writing that story anymore.
The most ironic thing about this is that I’m over here giving writing advice and telling you how to be a good writer, and I’m not following any of it. So I guess that’s something to work on this year. Anyway, that concludes this update. I genuinely have no idea when the next update will be, but I’ll talk to you in the next post.
So, ummm, unfortunately, the first story update, is that I have done nothing. I haven’t even thought about the story until I remembered to write this post. And that is not a joke. So, this update is very short, but by the next update post, I will have made some progress with it. Hopefully anyway.
One of my favourite plants, that isn’t a succulent, are Peace Lilies. They don’t need that much water, and they are easy to care for. In this post, I will cover all the tips and favs about Peace Lilies, and I promise I won’t write a whole rant about each fact. Here it is:
To water a Peace Lily, you usually have to wait until the leaves start drooping down a lot, water it, and fairly soon, the leaves will perk up again. If you are using water that has chemicals (like chlorine) in it, you will want to fill up a bottle of water the night before you plan to water it so that the chemicals can evaporate out, because Peace lillies are very sensitive to chemicals. Another thing that you can do to look after your Peace Lily is to turn over the soil when you water it, just to aerate the soil a bit. You don’t have to, but it may help your Peace Lily to thrive a bit more.
At night, A Peace Lily will continue to function even without sunlight. So if your air conditioner breaks and Carbon Monoxide goes into the air, a Peace Lily will neutralise it as much as it can, so when you think about it, a Peace Lily can save your life. NASA even did a study and rated them in the top 10 air purifying plants, which is quite good.
One thing to note about Peace Lily’s is that they do have flowers, but not every plant will grow them. When at a nursery, they probably will have flowers and eventually they will die. But I will be hard for them to grow back. And why is that? Usually nurseries will give them fertiliser, which is not available to the general public. So if your Peace Lily does grow a flower, give yourself a pat on the back. The flowers on Peace Lilies usually last about two months, so really appreciate the flowers while they’re there. However, they look pretty enough without flowers anyway.
When your Peace Lilies leaves start to go brown and look a little rotten, remove them as soon as possible to avoid any disease getting to your Peace Lily.
Peace Lillies prefer temperatures that most humans like as well, so they probably won’t survive somewhere really hot or somewhere really cold. You should also try and not put a Peace Lily near doors that will keep opening or closing, or just anywhere where they will get a draft.
One last thing to note is that Peace Lilies do like sun, it’s best to keep them about 1.5 meters away from a window, to avoid burning the leaves. You should also turn the plant every so often just so there is even light distribution. Quite often the leaves go brown and crispy from too much light as well.
I hope that you’ve learned something from this post, or that you are now considering getting a Peace Lily now!
Thank you for reading and I’ll talk to you in the next post!
This is what my Peace Lily looks like. I think the pot is getting a little bit too small for the plant, which is one of the reason the leaves closest to the stem are floppy. My Peace Lily has some new growth on it, and this is what new leaves look like. And I’m not sure why this photo is necessary, but this is what the stem looks like. As you can see, it is quite healthy but a little crowded, and there are quite a few crowns in there. This would be perfect for propagation, which I might make a post on later.
This blog is my blog, and I am very proud of it. I am not really a tech guru, and that means when I do something to this blog, like trying to add a new section, something wrong always happens. But I am pretty happy with this blog, how it’s come along so far. Now you might be wondering; ‘What on earth has that got to do with Aloe Vera?’ I’ll get to that in a minute.
This blog means a lot to me, and I don’t think I’ll ever become some kind of ‘Internet Influencers’ or whatever they’re called, but I feel like I can let the world know about what I am passionate about. And what that means to me is writing the truth, and writing about what I love. Which (not in any particular order) includes: Crocheting, Writing, Bullet Journalling, Reading and plants. Mainly houseplants. Which is where this blog post begins.
Aloe Vera
Aloe Vera is one of my favourite plants. I am a sucker for succulents, (no pun intended) and out of all of them, Aloe Vera is the best. Here are my reasons:
They look nice
They purify the air, even at night
They are so easy to take care of
They can be indoor plants or outdoor
They actually have a lot of skin benefits
They can grow in a variety of different countries
Aloe Veras are actually cacti, I they are designed for hot climates and probably won’t survive in Iceland, but I’d say a lot of the people viewing this would be in warmer climates.
It might just be me, but I honestly thing that Aloe Veras look so pretty and peaceful in a way. I own one Aloe, and I’ll insert a photo.
“Aloe governor!”
One thing that I think is my most favourite things about Aloes, is that they have so many skin benefits. Like I got sunburnt the other day and I thought, “I might test out putting Aloe Vera on it to see if they actually work.” And it worked. My sunburn went down significantly after applying it and leaving it on for twenty minutes. It also helps reduce physical scars, so I guess that’s a bonus. If you want to find out more, just go onto YouTube and you’ll find more information about Aloe Vera. But if you live in Australia, or anywhere on the Southern Hemisphere, I think that this would be a staple plant for you to have. It is just so good for sunburns.
I want to make more posts like this soon, going on rants about plants and why I love them so much, but that is all for now.
Thank you for reading and I’ll talk to you in the next post!
I don’t really write anything other than made up stories. Well, by that I mean I want to write stories, just I never do. So this is year I have decided to change that. I want to write a lot more than I do now, and possibly have a short story by the end of the year. Usually I just start the story and lose inspiration. I still have my NaNoWriMo story from last year, waiting to be worked on. And I haven’t looked at it from the 5th of November. So for this post, I decided to talk about planning a story.
When I am writing down things about the story, I use flashcards because they are just so satisfying to use. I like to seperate each Flashcard into a different thing, which may include; Plot ideas, scene ideas, characters, settings and so on. I like to give each individual Character a different flag card so I can look at them all in front of me. On one side, I give the characters appearance and on the flip side, I write down their personality.
Here is my one of my characters flash card, and all the key points I put in about them.
I am aware that my handwriting is very messy, but the main thing is that I can read it.
I will share more story planning advice later on, but that is the end of this post. There are a lot of other things that I am yet to talk about, in regards to planning a story, but that’s for another day.
Thank you for reading and I’ll talk to you in the next post!




 Get Hooked